
Creating a virtual lab to practice hacking into vulnerable virtual machines is a great way to learn terminal skills, as well as how to properly secure your applications.
The process of creating a virtual lab for hacking into virtual machines is very simple to do, and only requires a few downloads and configurations. There isn’t any required prerequisite knowledge, however it may be beneficial to have an understanding of basic Linux/UNIX terminal commands and installing packages. Let’s dive right in
Downloading VirtualBox
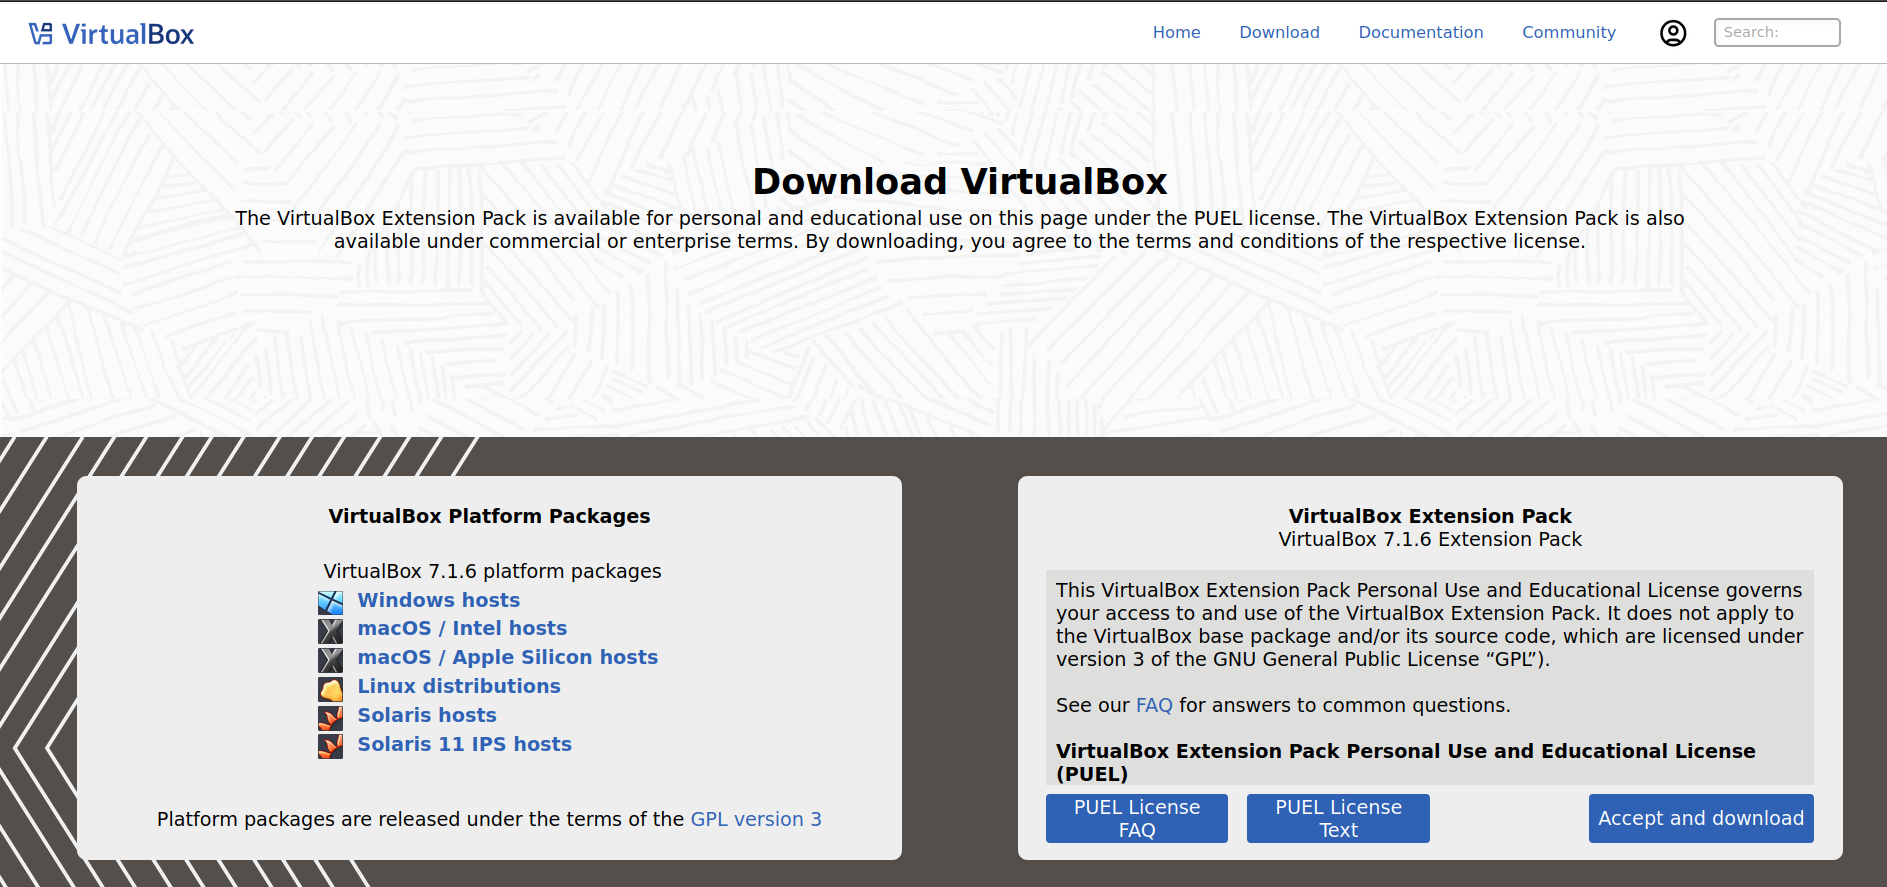
VirtualBox is a free program that allows you to run virtual machines on your computer, essentially simulating real computers entirely within your main computer. This program works on any platform and can be downloaded here. Click on the “Downloads” button and select the installer for the platform of your choice. While I run my lab on an Ubuntu machine, VirtualBox will run the same on any platform.
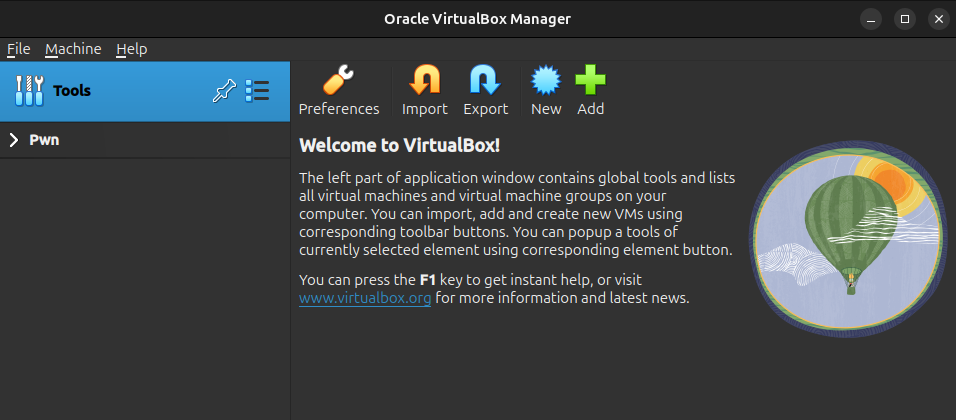
Once VirtualBox is installed, you should see a program titled “Oracle VirtualBox” on your computer. This is where your lab will live, so it may be helpful to create a shortcut on your desktop for this. Opening VirtualBox will greet you with the VirtualBox manager, where we will be adding our virtual machines. Note that depending on your operating system and computer, you may need to enable virtualization in your computer’s BIOS.
Downloading Kali
Kali is a Linux distribution that comes bundled with a variety of effective tools for hacking into systems, or in more ethical terms, penetration testing systems. It is perfectly legal to test the security of your own systems, but the same cannot be guaranteed for any systems that you do not own. For this reason, we’re going to be running our lab in a virtual sandbox on its own network, as we don’t want any stray commands to touch other machines outside of our host computer. I detail how to setup this virtual network later, but for now we need Kali in order to proceed.
Note: While it is possible to download the full installer of Kali and install the version with GNOME desktop, I have found this to be quite buggy when running in VirtualBox. For this guide, I will only be describing how to install the vbox version from Kali’s website. If you use the full installer of Kali, your mileage may vary.

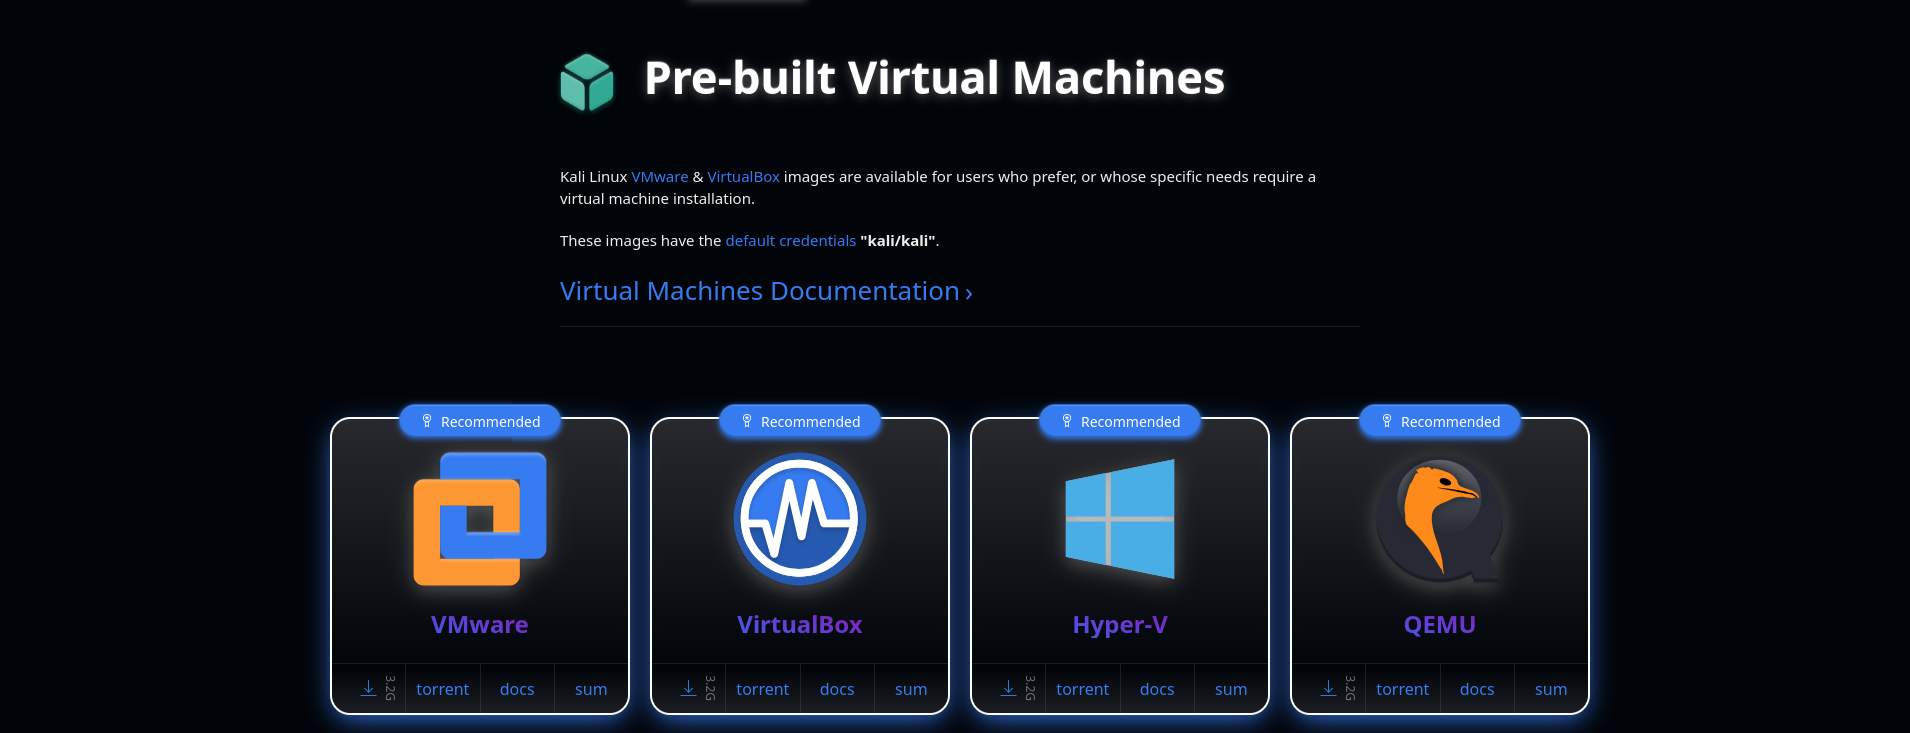
You can download Kali here, make sure to click on the download arrow next to the VirtualBox installer. This will download a prepared virtual machine instance that we can easily import into VirtualBox. Once it has finished downloading, right click on the downloaded file and select “Open with Oracle VirtualBox”, and VirtualBox will guide you through the process of adding the machine to your lab.
To run Kali, select Kali from the list of virtual machines, and then click “Start”. This will power up your virtual instance of Kali from within your computer. It may flash some warnings about a broken installation, however it will typically proceed to the desktop with no problems after a few seconds. If you attempt to start the virtual machine and multiple minutes go by stuck on these warning messages, then try restarting the virtual machine. Once on the login screen, use the default login: Username = kali , Password = kali . Very secure. This instance of Kali will contain all of the tools that we need to get started with testing virtual machines, and currently it is able to talk to the internet. Next, we will configure our lab to use a virtual network so our virtual machines can talk to each other.
Creating a Virtual Network
Method 1: Allows Internet Access (Bridged Adapter)
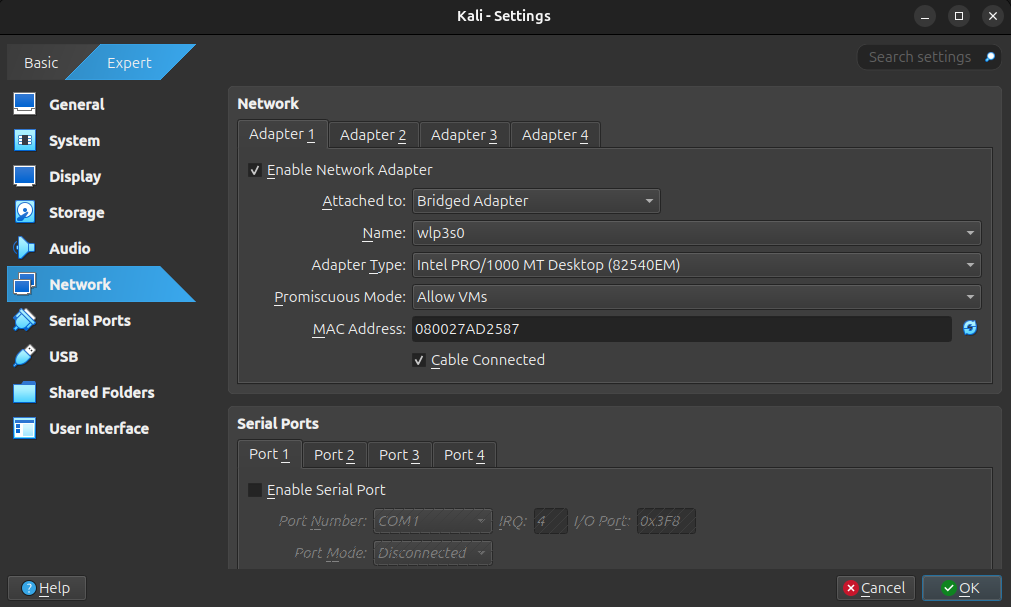
Thankfully, VirtualBox makes it very easy to create a new virtual network that will allow our VMs to talk to each other. To start, go back to the VirtualBox manager, and right click on the Kali virtual machine. Click on “Settings”, then click on “Network”. Additionally, switch the settings to “Expert” mode. Under “Attached To”, select “Bridged Adapter”. Depending on your host operating system, what you see under the “Name” section may differ, so connect it to the network adapter that you are using to access the internet currently (if you have a WiFi and Ethernet adapter, you may see multiple results). Next to “Promiscuous Mode”, select “Allow VMs”, as this will allow for our virtual machines to talk to each other.
Method 2: No Internet Access (Intnet)
This method will completely enclose our virtual network so none of our virtual machines can break outside of the sandbox. While this method is a bit more involved and requires some command line work, it is not too difficult to get up and running. First, go back to the VirtualBox manager, and right click on the Kali virtual machine. Click on “Settings”, then click on “Network”. Additionally, switch the settings to “Expert” mode. In order to make our new network, we will select the “Attached to” option to “Internal Network”, with the name “intnet” (this name should populate automatically). It is important that on all of the machines that we connect, that they all are connected to intnet, as this will allow the machines to talk to each other. Set “Promiscuous Mode” to “Allow VMs”, and make sure that the checkbox next to “Cable Connected” is set to enable. When you add any virtual machines in the future, you will need to repeat these steps, otherwise the machines will be unable to talk to each other. Close out of the settings box, as there are no more settings that need to be changed on the Kali machine.

Creating a DHCP Server
I promised that VirtualBox made it easy to start testing devices, however we do need to create a DHCP server in order to keep our lab fully offline. While I’ve been told that VirtualBox should handle DHCP automatically, I had trouble getting my machines to get IP addresses without a dedicated DHCP server. This is pretty simple to overcome thankfully, and my method is derrived from the Ubuntu documentation
To run our DHCP server, we will download a minimal Ubuntu Server image as another virtual machine in our lab. This can be downloaded from Ubuntu’s download page, and we will need to install it in VirtualBox. In the VirtualBox Manager, click on the “New” button to get started installing our server instance. Name it “DHCP”, and click on “ISO Image”. Set the ISO image to the downloaded Ubuntu Server file. When VirtualBox reads this file, it will automatically fill in most of the parameters for us. Click on the “Unattended Install” tab and set the username and password to something memorable, as we will need this in order to log in to the server. Then, click “Finish” for VirtualBox to automatically install Ubuntu Server.
Right click on the DHCP virtual machine, click on “Settings”, and click on “Network”. For the beginning setup, we want this virtual machine to be able to talk to the internet. Make sure that “Attached to” is set to “NAT” or “Bridged Adapter”. Once the virtual machine has finished installation, start the machine and log in with the login that you created. Note that Ubuntu Server does not contain a desktop interface, so we will need to navigate via terminal commands. Don’t worry! After setting up the server, we won’t need to touch this virtual machine again.

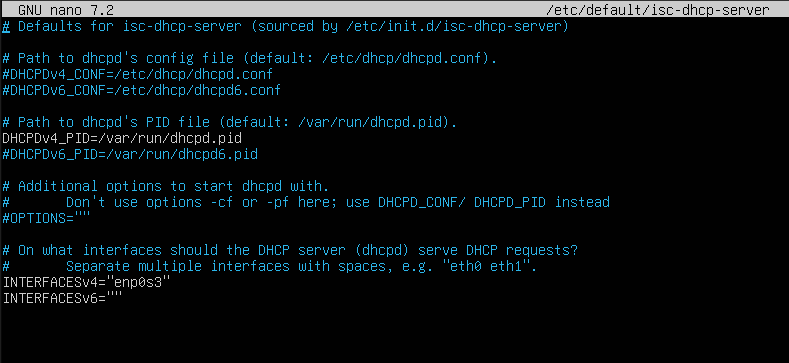
Once logged in, type in sudo apt install isc-dhcp-server. This is what will allow our virtual machines to get their IP addresses while offline. Then, type in ifconfig, which will return a list of network interfaces. Find the adapter that is connected on your server, it is most likely enp0s3. Next we will need to edit the configuration file to allow it to work. Type sudo nano /etc/dhcp/dhcpd.conf, this will open a terminal based text editor that will allow us to edit the configuration file.
Use the arrow keys to get to the bottom of the file, and add the following lines:
|
|
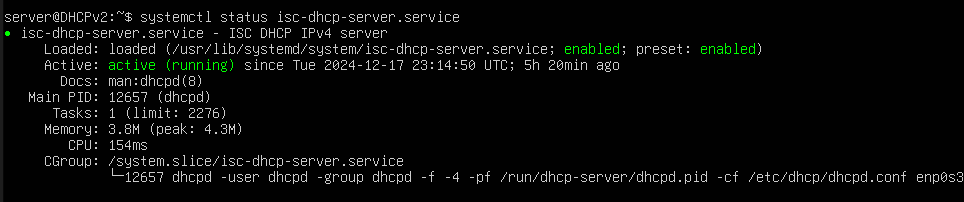
Next, click Ctrl+S to save, and then Ctrl+X to exit nano. Then, we need to set the interface that the DHCP server is serving on. Type sudo nano /etc/default/isc-dhcp-server, and update the line that starts with “INTERFACESv4” to INTERFACESv4="enp0s3", or if you have a different network interface (from ifconfig) then set the interface accordingly. Save and close the file with Ctrl+S and Ctrl+X. Lastly, type sudo systemctl restart isc-dhcp-server.service, and verify that the service is running correctly by typing systemctl status isc-dhcp-server.service. Systemctl should show that the service is active, which means that it is now serving IP addresses to any clients that connect. This is the end of the command line work that we need to do, so go ahead and minimize the DHCP server window.
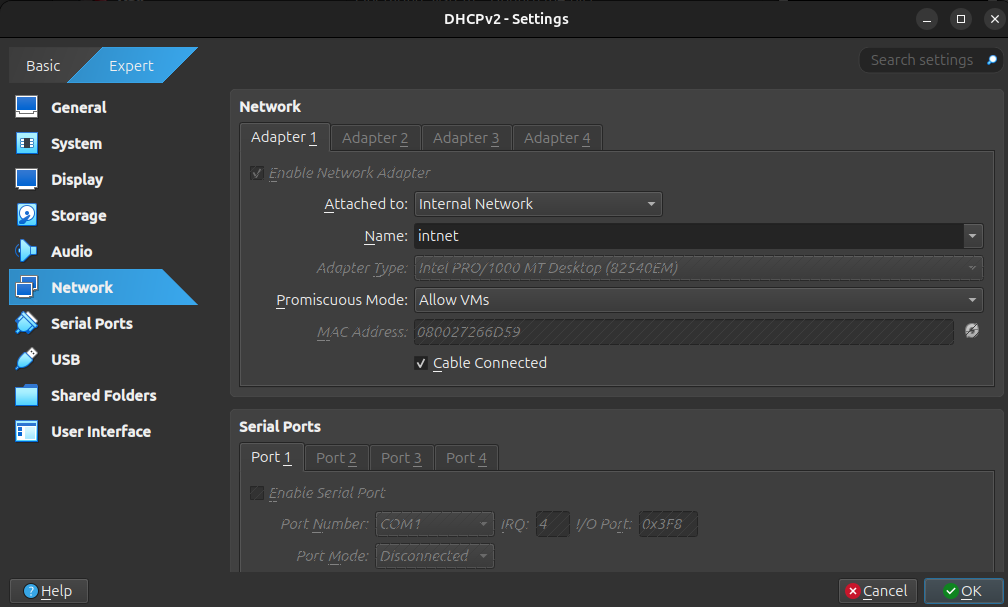
 Right click on the DHCP virtual machine, click on “Settings”, then “Network”, and set “Attached to” to “Internal Network”. Note that the name “intnet” should be the same as the name on your Kali VM, otherwise these machines will not be able to talk to each other. Make sure to change “Promiscuous Mode” to “Allow VMs” and ensure that the cable is connected.
Now, the DHCP server is configured for our needs. Note that any time that you want to do any pen-testing, you will need to start the DHCP server to ensure that your machines can talk to each other. When stopping testing for a period of time, I like to save the state of the DHCP machine instead of powering it off fully.
Next Steps
Our lab is fully set up! Now it is time to start downloading virtual machines and get to testing. A source that I trust for getting virtual machines is VulnHub, which aggregates a bunch of virtual machine images that are ready to run on your lab. A great place to start is The Planets, but feel free to start on any machine that appeals to you. Once you download the machine that you want to test, make sure you set the network settings to the networking option that you followed above.